From overwatering to nutrient issues, here’s how to troubleshoot yellowing leaves and get your indoor plants back on track with practical, step-by-step fixes.
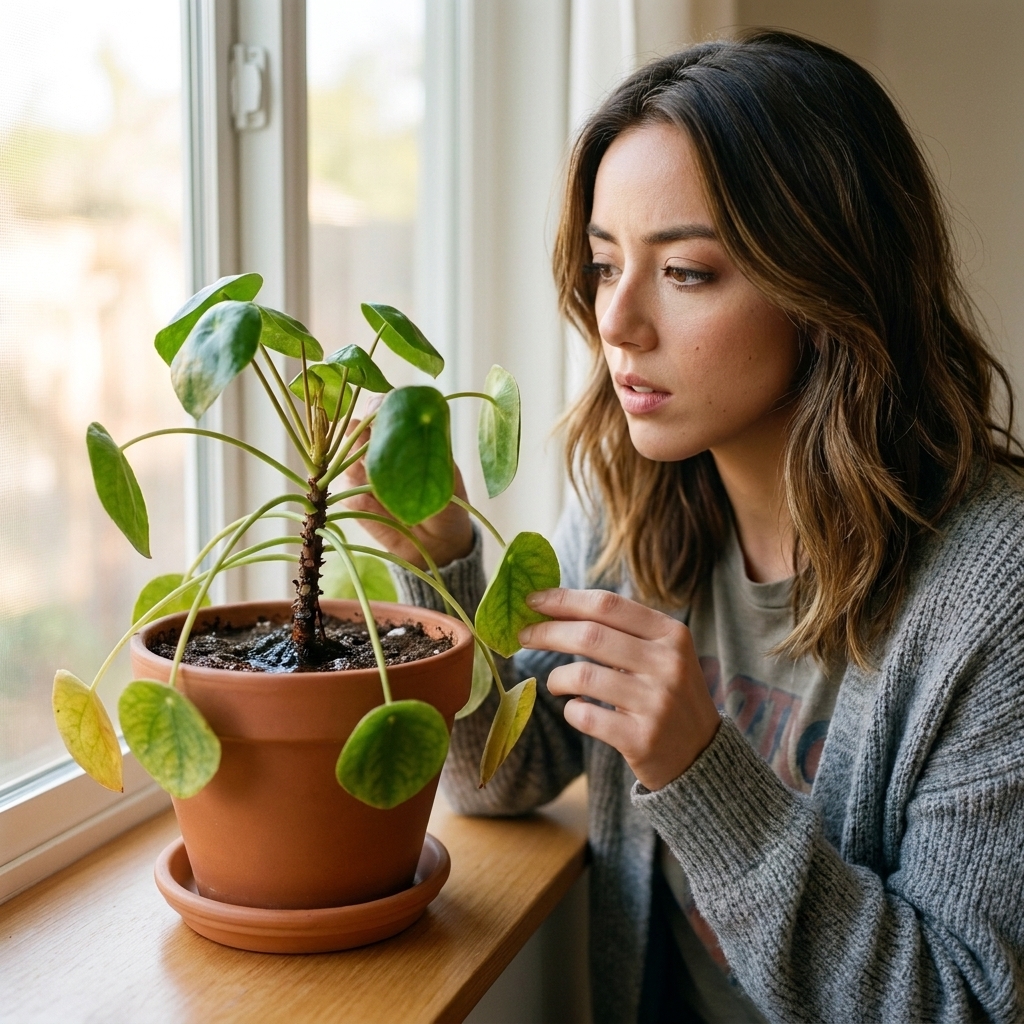
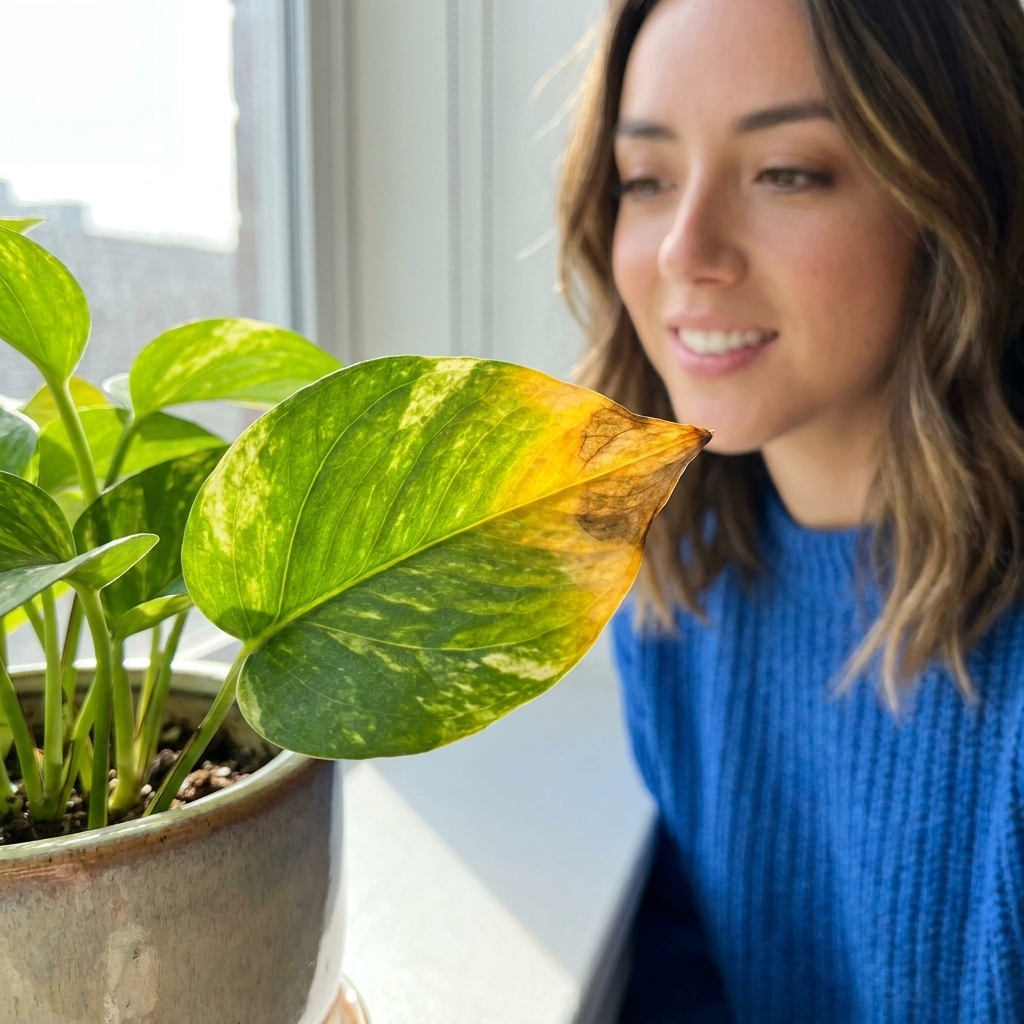
Yellow leaves can feel like a personal critique from your plant, but I promise it is usually just a solvable care mismatch. A yellow leaf is your plant reallocating resources or reacting to stress. Your job is to figure out which stress. This guide will walk you through a calm, step-by-step diagnosis so you can stop the yellowing and prevent the next wave.
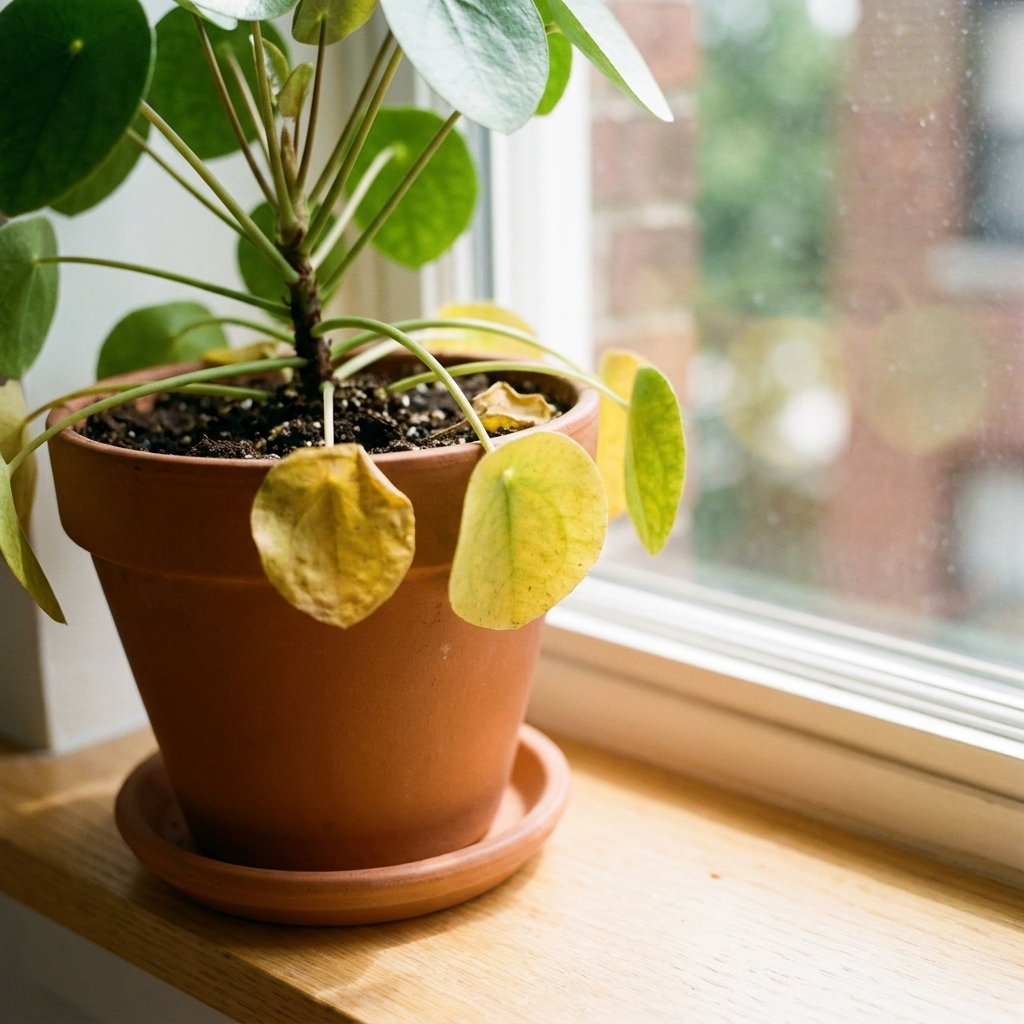
First: Decide if it is normal aging
Sometimes yellow leaves are not a problem at all. Most houseplants naturally shed their oldest leaves as they grow new ones. Before you overhaul your routine, check for these signs of normal aging:
- Only 1 to 2 older, lower leaves yellow at a time
- New growth looks healthy (good color, normal size)
- Yellowing is slow (days to weeks), not sudden overnight collapse
If this matches your plant, you can simply remove the yellow leaf once it is mostly yellow (it usually will not turn green again) and keep your care consistent.
The 60-second yellow leaf triage
If yellowing is spreading, do this quick check before you read anything else:
- Touch the soil about 2 inches down (or about a knuckle deep). Is it wet, evenly damp, or bone dry?
- Look at where the yellowing starts. Older bottom leaves, newer top leaves, or random spots?
- Inspect the leaf texture. Soft and limp, or dry and crispy?
- Check the pot and drainage. Is there a drainage hole? Is the plant sitting in water? Is a nursery pot tucked inside a decorative cachepot where water can hide?
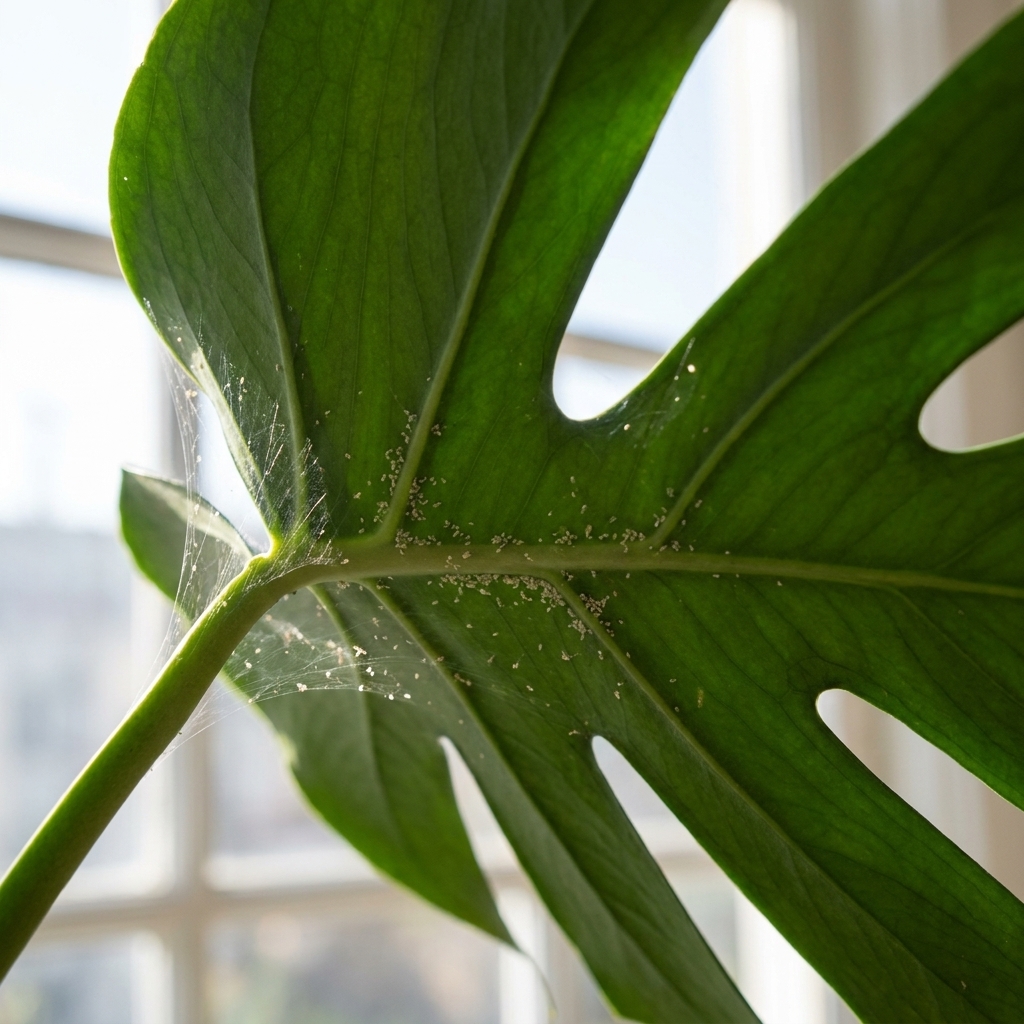
- Scan for pests. Look under leaves and along stems for webbing, dots, sticky residue, or cottony clumps.
Those five clues usually narrow yellowing down to one of the core causes below.
Cause #1: Overwatering
If I could gently take one habit away from new plant parents, it would be “just in case” watering. Excess water fills air pockets in the soil, reducing oxygen available to roots. Once roots struggle, leaves often turn yellow because the plant cannot support them the same way.
What it looks like
- Yellowing starts on lower, older leaves
- Leaves may feel soft or a bit mushy
- Soil stays wet for many days, pot feels heavy (especially compared with when it is dry)
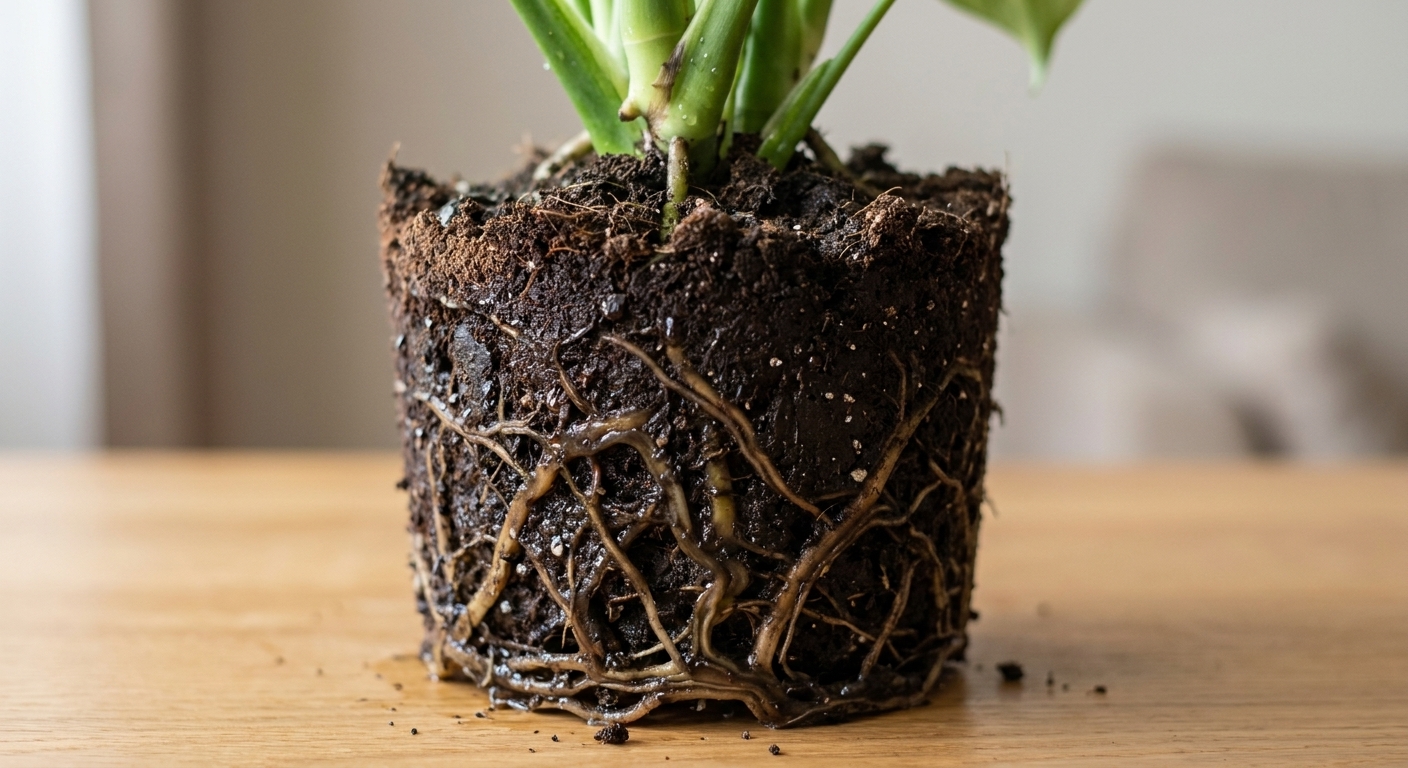
- Possible fungus gnats, sour smell, or blackened roots if you unpot
How to fix it
- Pause watering until the soil dries to the correct depth for your plant (often top 1 to 2 inches for many tropicals, more for succulents).
- Empty the saucer 10 to 20 minutes after watering. No “wet feet.”
- Confirm drainage. If the pot has no hole, repot into one.
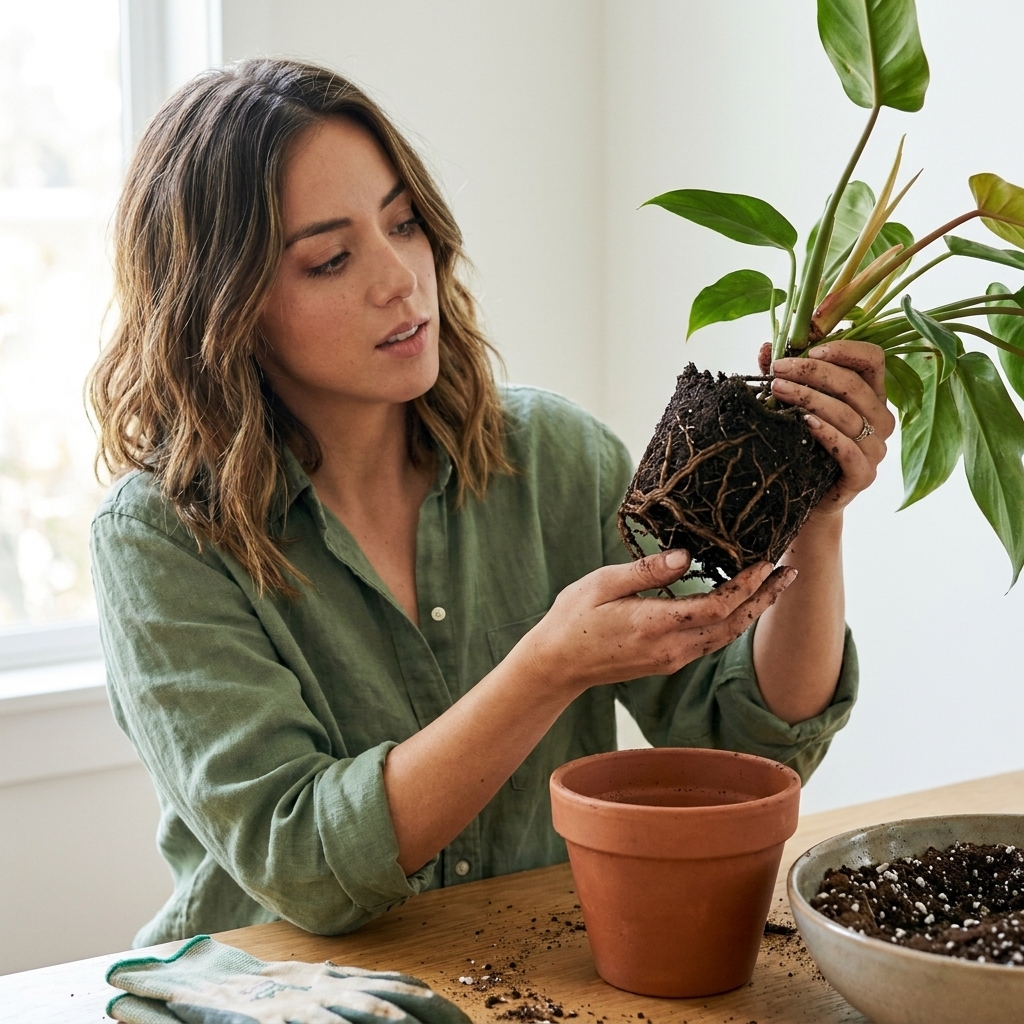
- If soil is soggy and yellowing is accelerating, unpot and check roots. Trim black, mushy roots, then repot into fresh, airy mix.
Cause #2: Underwatering
Underwatering can also cause yellow leaves, especially when the plant is repeatedly allowed to get too dry. Some plants will yellow older leaves first to conserve water for new growth.
What it looks like
- Soil is dry and pulling away from the pot edges
- Leaves may yellow and then turn crispy
- Plant droops, then perks up quickly after watering
How to fix it
- Water thoroughly until water runs from the drainage hole.
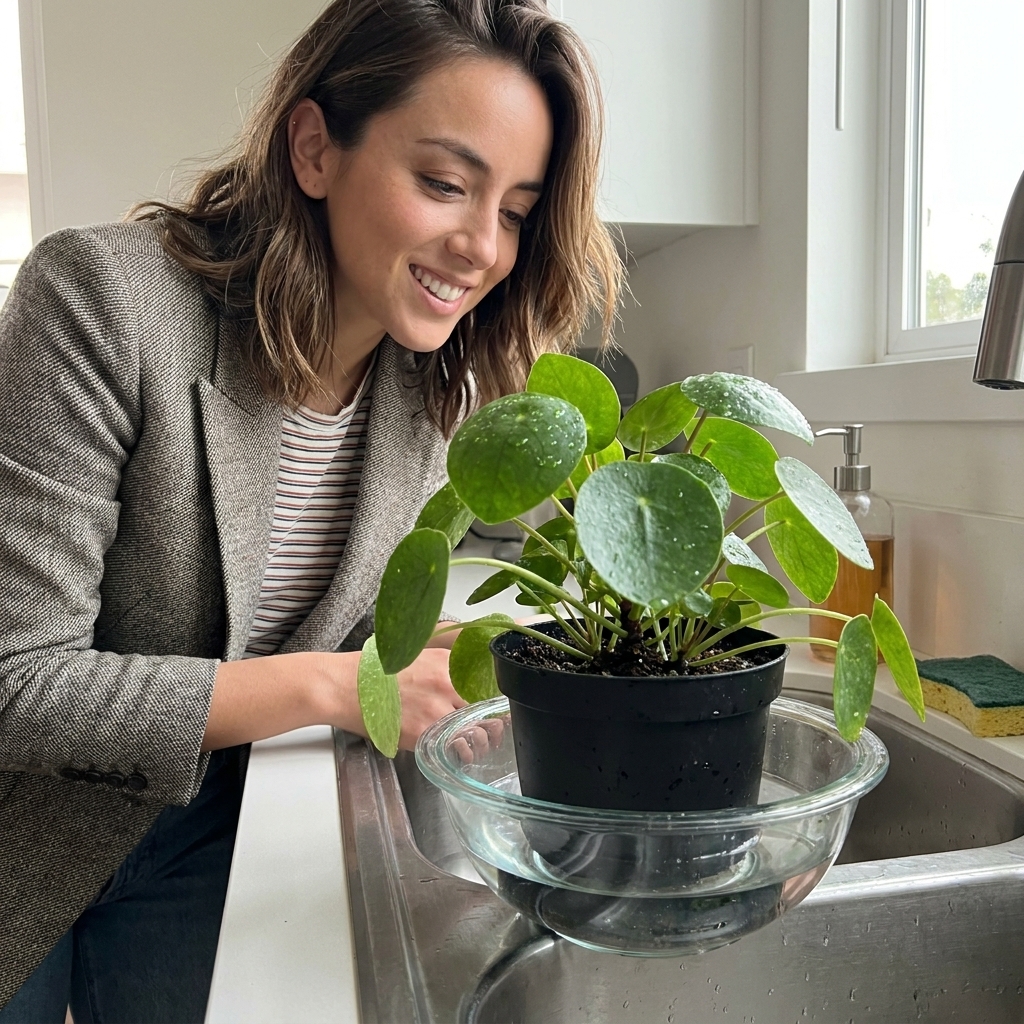
- Use the soak method if water runs straight through: place the pot in a bowl of water for 15 to 30 minutes, then drain well.
- Reset your routine based on soil feel, not the calendar. Most yellow-leaf cycles start with inconsistent watering.
Cause #3: Light stress
Light problems can look like nutrient issues, watering issues, or “mystery yellowing,” so it helps to be specific about your plant’s location and the kind of light it gets.
Too little light
- Slow growth, smaller new leaves
- Leggy stems reaching toward a window
- Older leaves yellow and drop because the plant cannot “pay” to keep them
Fix: Move closer to a bright window, or add a grow light. A good starting point is placing the light about 8 to 12 inches above the plant for 8 to 12 hours daily, then adjust based on the fixture’s guidance and how your plant responds. Rotate weekly for even growth.
Too much light
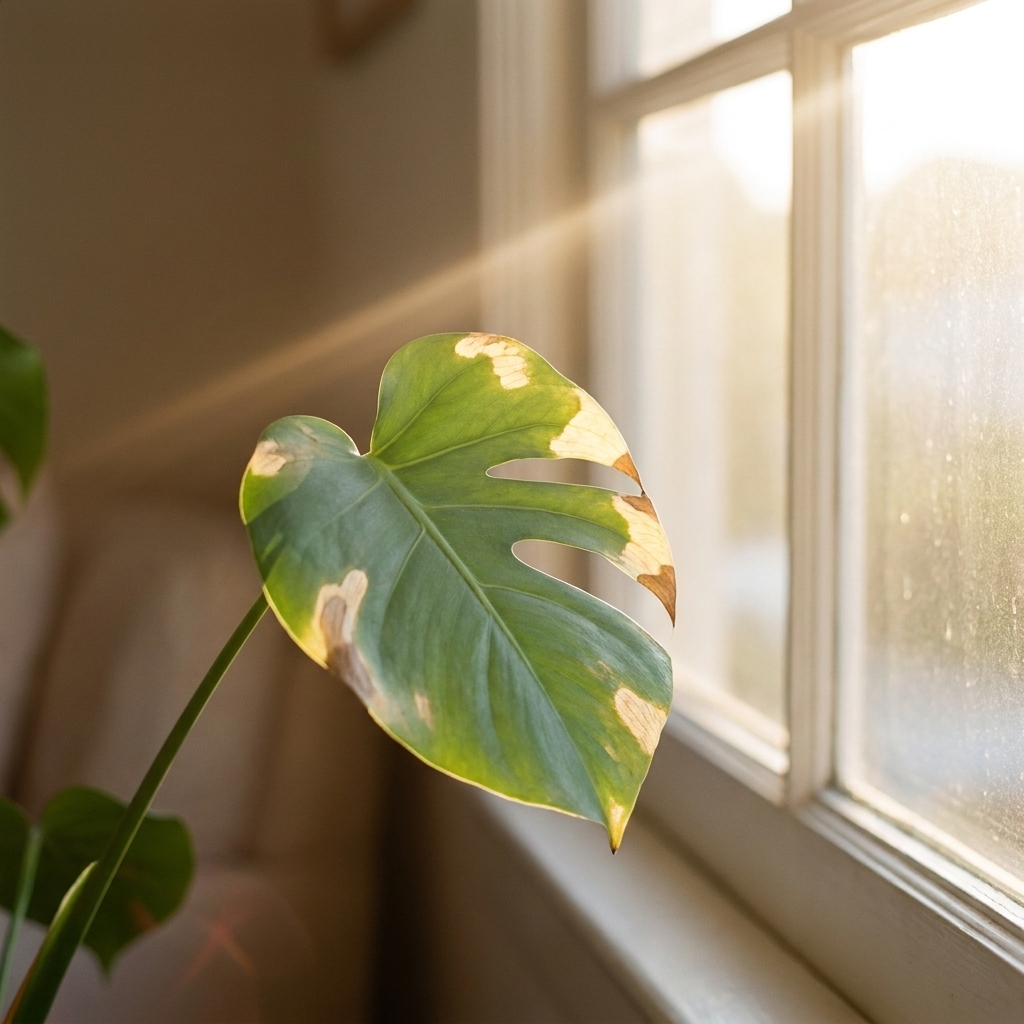
- Yellowing or bleached patches, often on the side facing the sun
- Crispy, papery areas that may turn brown
- Most common in strong afternoon sun through glass
Fix: Pull the plant back from the window, use a sheer curtain, or relocate to bright indirect light.
Cause #4: Nutrient issues
Yellow leaves can signal nutrient issues, but indoors it is often not just “needs fertilizer.” It can be under-feeding, over-feeding, salt buildup, pH problems that lock nutrients out, or potting mix that has become compacted and depleted.
Clues you may be under-feeding
- Overall pale color during active growth
- New leaves are smaller or lighter than usual
- Plant has been in the same potting mix for a year or more
Fix: Feed with a balanced houseplant fertilizer at half strength during spring and summer. If you rarely fertilize, start low and slow. If yellowing is mostly on older leaves, think mobile nutrients like nitrogen. If it is hitting newest leaves first or you see yellow with green veins, think availability issues like iron and pH.
Clues you are over-feeding
- Yellowing plus brown, crispy tips
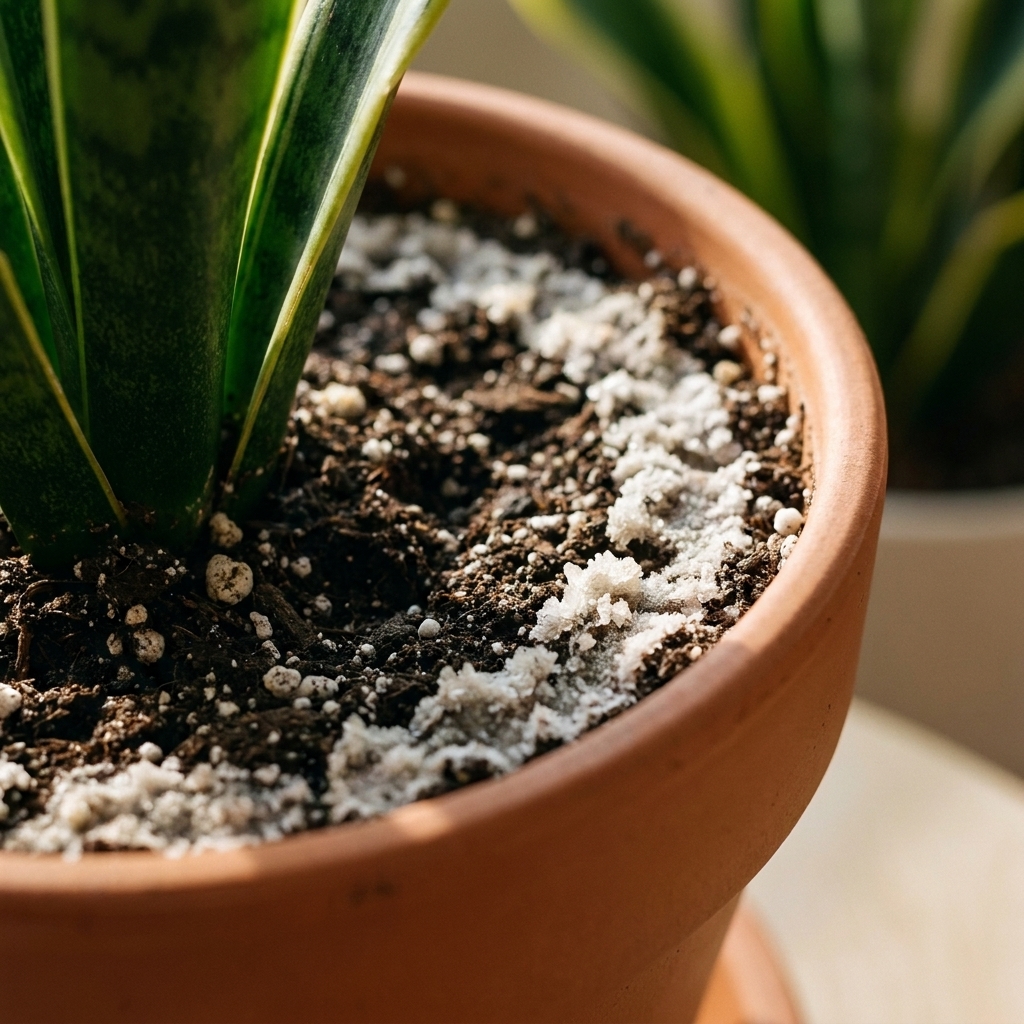
- White crust on soil surface or pot rim
- Fertilizer used more often than label suggests
Fix: Flush the soil with room-temperature water for several minutes (let it drain fully), then pause fertilizing for 4 to 6 weeks. In severe cases, repot into fresh mix.
Cause #5: Temperature and dry air
Indoor plants can yellow when they are stressed by drafts, heat vents, sudden cold snaps near windows, or very dry air. This is especially common in winter.
What it looks like
- Yellowing soon after a weather change or HVAC change
- Leaf edges may brown or curl
- Plant sits near an exterior door, drafty window, radiator, or vent
How to fix it
- Move the plant 1 to 3 feet away from vents and draft sources.
- Keep temps steady. Many tropical houseplants prefer roughly 65 to 80°F.
- Boost humidity with a humidifier or a simple plant grouping. Skip misting as your main strategy since it is short-lived.
Cause #6: Pests
When watering and light seem fine but yellowing continues, pests are the next thing I check. Many sap-sucking pests cause stippling, yellowing, and general decline because they literally drain the plant.
Quick pest ID
- Spider mites: fine webbing, tiny specks, dusty look, leaves yellow and dry
- Thrips: silvery streaks, distorted new growth, tiny fast-moving insects
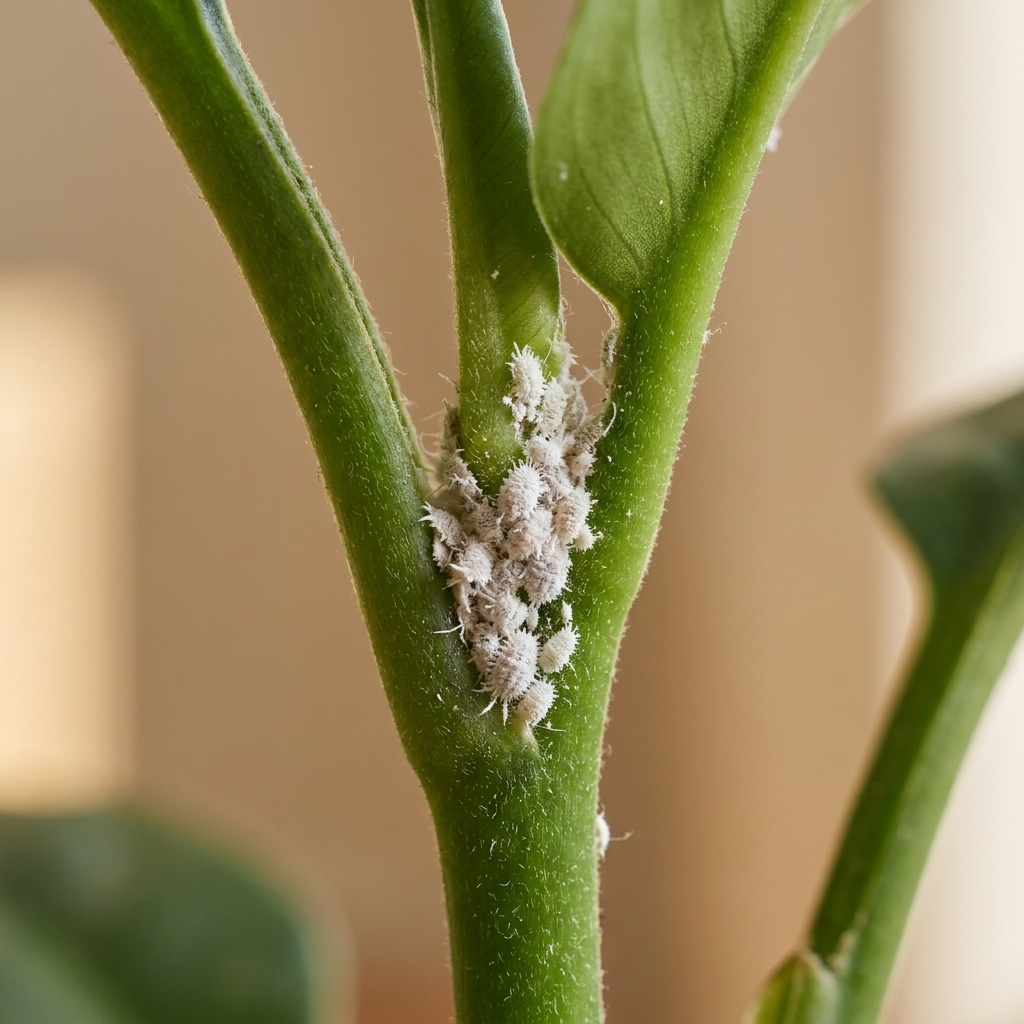
- Mealybugs: cottony clumps in leaf joints and along stems
- Scale: tan or brown bumps on stems and leaf undersides
- Aphids: clusters on new growth, sticky residue
How to treat
- Isolate the plant immediately.
- Rinse the foliage in the shower or sink to knock pests off.
- Wipe leaves and stems, especially undersides.
- Treat with insecticidal soap or horticultural oil, repeating every 7 to 10 days for 3 to 4 rounds.
Cause #7: Repotting and root crowding
Yellow leaves can happen after repotting, after moving homes, or after a big change in lighting. Plants like consistency, and they show stress in their leaves. On the flip side, being severely rootbound can also cause yellowing because the plant cannot access water and nutrients evenly.
Signs of transplant shock
- Yellowing starts within 1 to 3 weeks of repotting or relocating
- Plant otherwise looks stable, no pests, no soggy soil
Fix: Keep conditions steady, avoid fertilizing for about a month after repotting, and water only when appropriate.
Signs of a rootbound plant
- Roots circling the pot or coming out of drainage holes
- Soil dries extremely fast, watering feels like it “does nothing”
- Stunted growth with frequent yellowing of older leaves
Fix: Repot 1 pot size up, loosen circling roots gently, and use fresh mix with good aeration.
Cause #8: Water quality
Some houseplants are extra dramatic about water quality. While poor water quality more commonly shows as brown tips, it can contribute to general yellowing over time, especially when combined with other stressors.
Who is most sensitive
- Calatheas and other prayer plants
- Dracaena
- Spider plants
How to test this theory
- Switch to filtered, distilled, or rainwater for 3 to 4 weeks.
- Let tap water sit out overnight to allow some chlorine to dissipate. If your municipality uses chloramine, sitting it out will not help much, so use a filter rated for chloramine or choose another water source.
- Flush the soil monthly to reduce mineral buildup.
Cause #9: Potting mix problems
Sometimes the issue is not how often you water, but what the roots are sitting in. Old mix can compact, peat-heavy mixes can turn hydrophobic, and some soils drain so poorly that roots stay stressed even with “reasonable” watering.
What it looks like
- Water pools on top, then drains down the sides
- The pot dries in a weird pattern: bone dry in spots, soggy in others
- Mix looks shrunken and pulls away from the pot wall
Fix: If your mix is old, compacted, or behaving like a sponge in the worst way, repot into fresh, airy soil. For many common tropical houseplants, adding orchid bark or perlite helps keep oxygen moving through the root zone.
Cause #10: Disease and chemical stress
If the yellowing comes with distinct spots, halos, or rapidly spreading damage, think beyond the usual watering and light suspects. Leaf spot diseases and accidental chemical exposure can both show up fast.
When to suspect disease
- Yellowing with brown or black lesions, sometimes with a yellow halo
- Spots that spread, especially in consistently wet foliage
- Multiple leaves developing similar blotches
Fix: Remove the worst affected leaves, avoid wetting foliage, and improve airflow and spacing. If it continues to spread, isolate the plant and consider a product labeled for houseplant leaf spot, following the label exactly.
When to suspect chemical stress
- Sudden yellowing after using cleaning sprays, air fresheners, or pesticides nearby
- Damage concentrated on the side facing the spray or a window that was cleaned
Fix: Rinse the foliage with plain water, move the plant to fresh air and stable light, and avoid repeat exposure.
Where yellowing starts matters
If you are stuck between two causes, use this pattern guide:
- Oldest leaves yellow first: often overwatering, underwatering cycles, low light, normal aging, or a mobile nutrient issue like nitrogen
- Newest leaves yellow first: often nutrient availability issues (commonly iron and pH), pests attacking new growth, temperature shock, or chemical stress
- Yellow leaves with green veins: often chlorosis tied to nutrient availability (commonly iron), pH, or depleted soil
- Random yellow spots: pests, sunburn, disease, or inconsistent watering
Patterns are not perfect, but they are incredibly helpful when paired with a soil check.
Should you cut off yellow leaves?
Yes, with a small caveat. A leaf that has turned fully yellow usually will not turn green again. Removing it can improve airflow and reduce stress, but do not strip the plant bare.
- Wait until the leaf is mostly yellow, then snip it close to the stem with clean scissors.
- If only the tip is yellow, you can trim the tip for appearance, but focus on the underlying cause.
- Avoid removing more than about one-third of the foliage at once unless you are dealing with rot, pests, or disease spread.
Yellow leaves by plant type
Pothos, philodendron, monstera
Most yellowing is watering-related or low light related. These plants prefer to dry slightly between waterings, and they yellow fast when kept constantly wet.
Snake plant and ZZ plant
Yellowing often points to overwatering. Let soil dry deeply and ensure the pot drains freely. If the base is soft, check for rot quickly.
Calathea and maranta
Yellowing can come from inconsistent watering, low humidity, or water quality sensitivity. Keep evenly moist (not soggy), raise humidity, and consider filtered water.
Ficus
Yellowing can follow moving the plant or inconsistent watering. They like bright light and a steady routine. Avoid cold drafts.
When yellowing is an emergency
Act fast if you see any of these:
- Many leaves yellowing at once plus wet soil
- Black, mushy stems or a sour smell
- Wilting with wet soil (classic root trouble sign)
- Visible pests spreading to nearby plants
- Fast-spreading spots that look like a leaf disease
In these cases, prioritize root inspection, disease hygiene, and pest isolation. Waiting “to see what happens” usually costs more leaves.
Yellow leaf prevention
- Water by soil feel, not by date. Use your finger, a chopstick, or a moisture meter you actually trust.
- Use pots with drainage holes whenever possible. If you use a cachepot, double-check that water is not pooling at the bottom.
- Match light to the plant, then keep it consistent. Sudden light changes trigger stress.
- Fertilize lightly in the growing season and flush salts occasionally.
- Inspect weekly for pests, especially under leaves and at new growth.
FAQ
Can a yellow leaf turn green again?
If a leaf is fully yellow, it almost never returns to green indoors. If the yellowing is early and mild and you correct the cause quickly, you may see some improvement, but focus on stopping new leaves from yellowing and supporting healthy new growth.
Why are my leaves yellow even though I am not overwatering?
Two common surprises are low light (soil stays wet longer, roots struggle) and compacted or depleted potting mix (roots cannot access oxygen or nutrients well). Also check for pests, drafts, and leaf spot symptoms.
Is it okay to fertilize a plant with yellow leaves?
Only if you are confident the plant is not waterlogged and the roots are healthy. Fertilizing a stressed plant can make things worse. If you recently repotted, wait about a month before feeding.
How many yellow leaves is too many?
One or two older leaves every so often can be normal. If you see multiple leaves yellowing in the same week, or yellowing marching upward fast, treat it as a real signal and start with a soil moisture check.